In this post I’ll show you how to use a Raspberry Pi and some soldering skills to automate old Somfy blinds via the MQTT protocol exposed to Home Assistant and Google Home.
Somfy blinds
We’ve moved to a new apartment and one of its features are external blinds (a.k.a. covers) that are controlled through a dedicated remote of the Somfy brand. However, just like with a TV, finding the remote is often tricky, so I decided to try and automate the external blind movements through Home Assistant and further voice commands of Google Home.
The system in place is a Somfy’s Telis 4 RTS Pure remote, with two remotes, each being able to program 5 channels (4 individual ones and combined). The system uses a legacy, proprietary radio protocol called RTS, which only Somfy and Telis use.
Somfy offers a RTS bridge called Somfy MyLink for a wooping ~300CHF, which is a little steep for something that is not necessary and just scratching an itch. Also, there’s not much fun in that.
Pi-Somfy
Turns out, Nickduino had a similar itch to scratch. Using 3-4 CHF-worth of hardware components, it is quite easy to build a software radio that will immitate a Somfy Telis remote and control the blinds.
There’s an bare-bones Somfy Remote Arduino sketch that shows how the protocol works. I originally wanted make the blind controller as small as possible and base it on an ESP32, taking that sketch and controlling it via arduino-mqtt.
Turns out there is a full MQTT/web interface script Nickduino/Pi-Somfy that also only goes into the details of how to solder things, and connect things onto a Raspberry Pi. Laziness won the day, especially as I wanted to use my spare Pi for something anyway.
The hardware
Usually for 433MHz signals you could easily use a ready-made module such us this 2CHF sender-receiver pair. However, in order for Somfy to make their RTS even more proprietary than it already was, it is not using the typical 433.93MHz frequency but 433.42MHz 🤦♂️. This means one will need to do some soldering.
The PiSomfy hardware guide is excellent in telling you what you need. I got:
- 5 ready
433.93MHzsender circuits - 10 pieces of the
433.42MHzoscilator - because my soldering is terrible - male-male jumper cables - to avoid soldering 😉
- (already had it) a solid copper cable to use as an antenna
After 4 weeks, all the eBay items were in place, and I could start soldering. Turns out de-soldering things off is much harder than soldering things on. I managed to peel away the original oscillator with by applying leverage underneath it using a swiss army knife and heating its connectors one by one. Soldering the new one was quite easy in comparison.
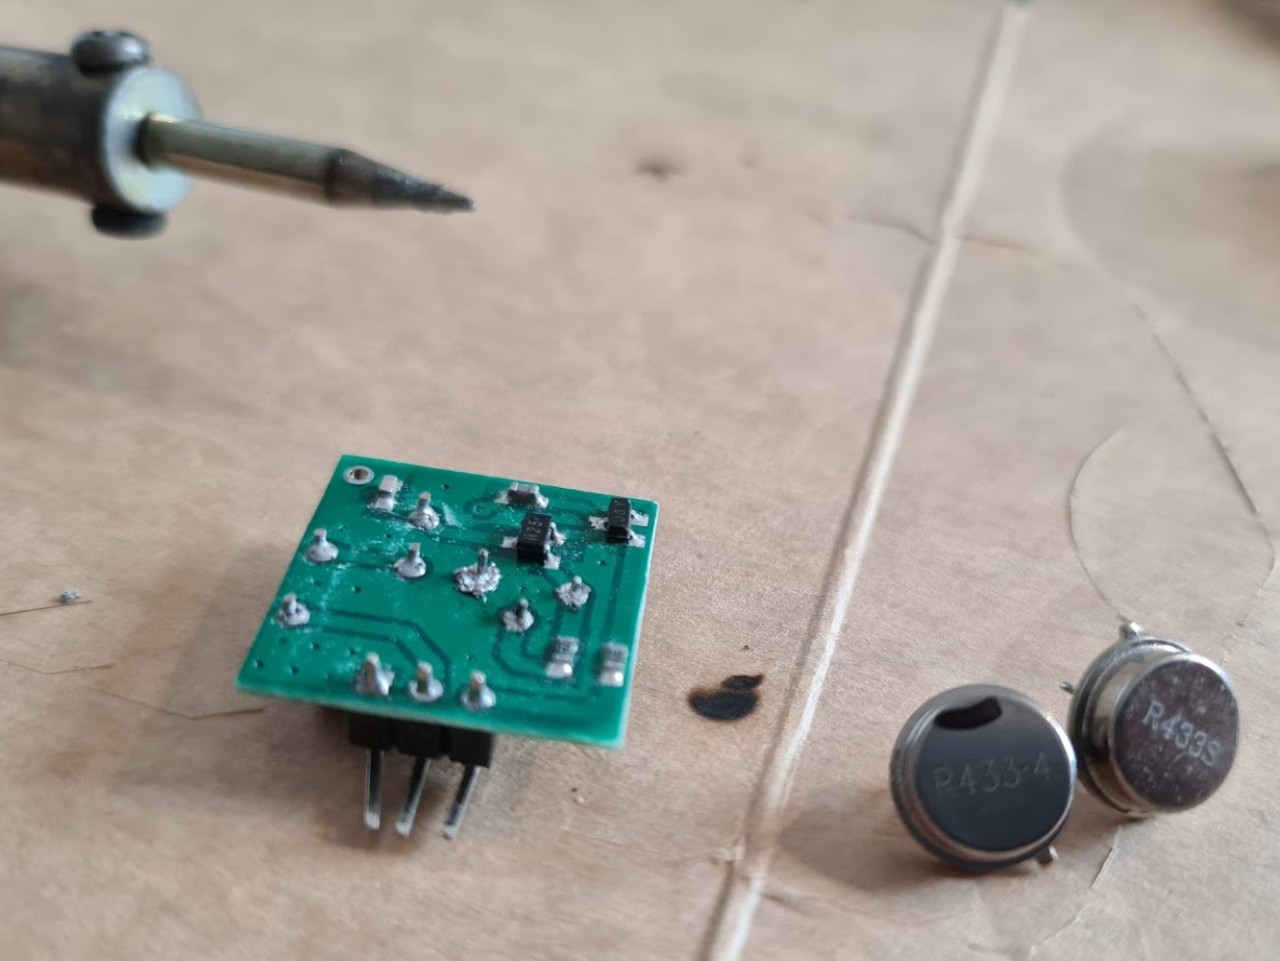
It’s not pretty but it worked.
I then took a 17cm piece of solid copper cable, and wrapped it into a small coil. Turns out soldering a think 1mm cable to a tiny connector was the trickiest bit, but with the right amount of patience, things will stick eventually.
Eventually, the fully connected sender fits nicely into a Raspberry Pi enclosure after connecting everything to the GPIO 4 pin:
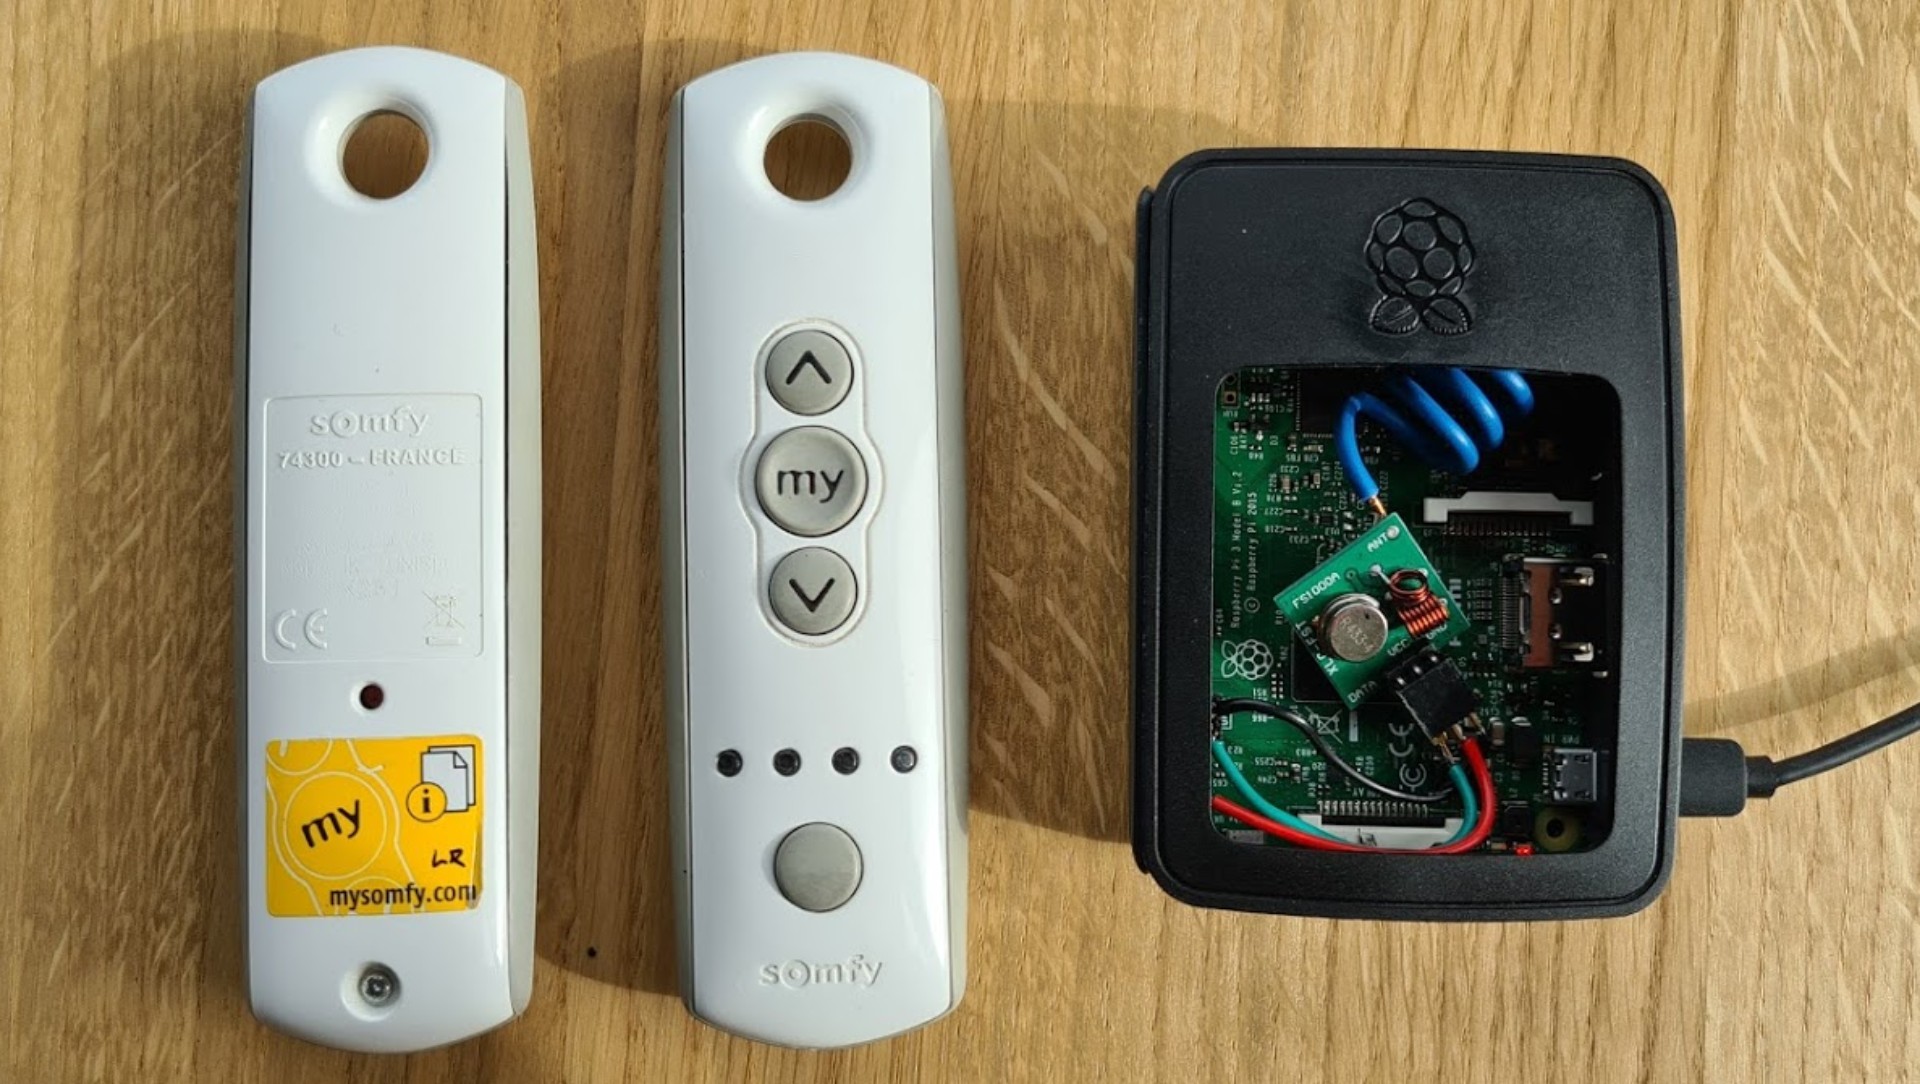
All fits nicely into a standard Pi enclosure. The remote we’ll be replacing are on the left.
Programming
Installing Pi-Somfy is super easy, just follow these steps. It assume you install it under the default pi user in /home/pi, and comes with a handy systemctl service for auto-starting the system.
By default it will come up on port :80 of your Pi. Programming the blinds takes a little bit of time. The procedure is as follows:
- Set the right channel (individual blind, or all) on the remote you’re programming from.
- Measure the time in seconds it takes for each blind to come fully down.
- Click Add new to put in the name (this will be your MQTT name by the way) and add in the time.
- Using a pen, press the “hole” on the other side of the remote. This sends the signal to the blind to accept programming a new remote.
- Press Save and follow the instructions. The blind should “wiggle” once programmed.
Note: The system relies on time to figure out where the blind is percentage-wise. It can often get things wrong (e.g. if you stopped it mid-through), or on the all-channel if blinds have different lengths (e.g. balcony). But in practice it works remarkably well.
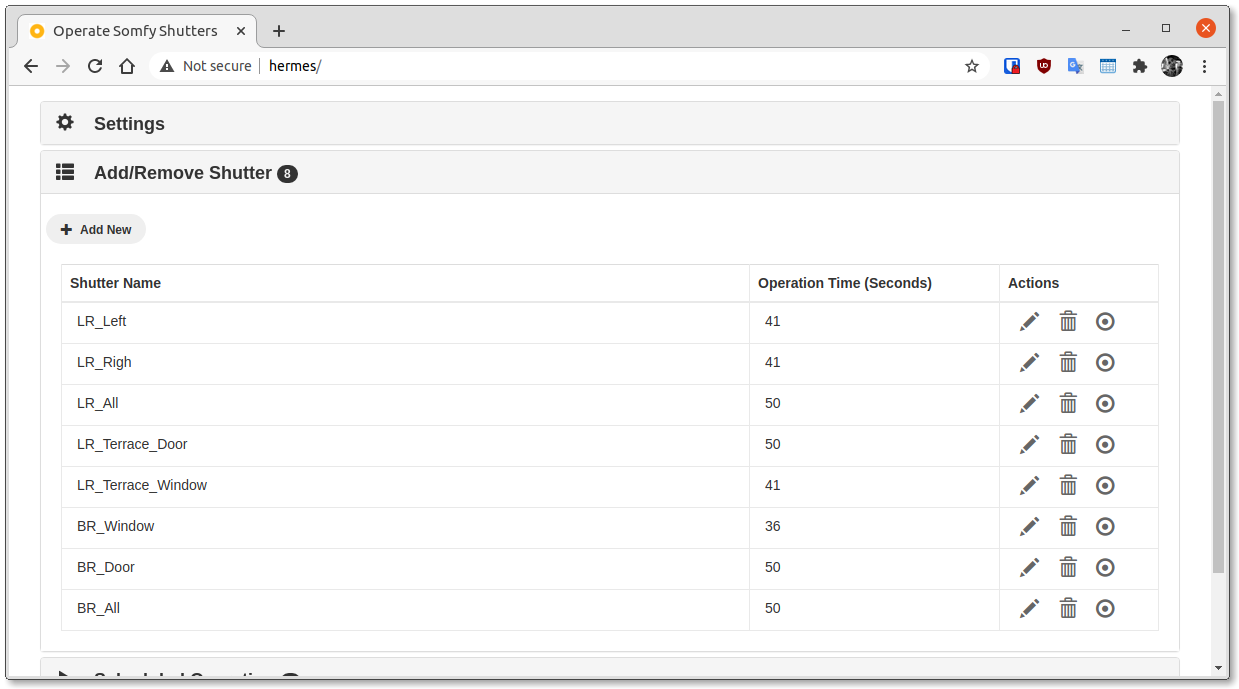
Fully programmed blinds.
Configuring MQTT
MQTT is a standard protocol for message brokers, and finds a lot of use in home IoT. For most use cases, it has a simple publish-subscribe mechanic based on topics.
Installing Mosquitto
Home Assistant has an embedded MQTT broker, but it is highly advised to use an external one, such as Mosquitto. You should install it on the same machine that runs Home Assistant, as it will act as a hub for other MQTT-connected services. To do that on Ubuntu:
sudo apt-get update
sudo apt-get install mosquitto mosquitto-clients
Now let’s set up a password file in /etc/mosquitto/passwd with a user for homeassistant and pisomfy.
sudo mosquitto_passwd -c /etc/mosquitto/passwd homeassistant
Password: YourHomeAssistantPassword
sudo mosquitto_passwd -c /etc/mosquitto/passwd pisomfy
Password: YourPiSomfyPassword
Then, enforce use of passwords in mosquitto by editing /etc/mosquitto/conf.d/default.conf and changing it to:
allow_anonymous false
password_file /etc/mosquitto/passwd
For debugging purposes, open a separate tab on the same machine and subscribe to all messages under the home-assistant/# topic via:
mosquitto_sub -u homeassistant -P YourHomeAssistantPassword -p 1883 -h 127.0.0.1 -v -t "home-assistant/#"
This will come in handy to check things are working.
Configuring Home Assistant
Update your /etc/homeassistant/configuration.yaml to add:
mqtt:
  broker: 127.0.0.1
  username: homeassistant
  password: "YourHomeAssistantPassword"
  discovery: true
Restart Home Assistant
sudo systemctl restart homeassistant
Configure PiSomfy
On your Pi machine, open /home/pi/operateShutters.conf and edit the `[MQTT] section to look as follows
[MQTT]
# Location (IP Address of DNS Name) of the MQTT Server
MQTT_Server = myHAmachine # or hostname of your home assistant machine
# Port of the MQTT Server
MQTT_Port = 1883
# Username for the MQTT Server
MQTT_User = pisomfy
# Password of the MQTT Server
MQTT_Password = YourPiSomfyPassword
# Enable auto discovery
EnableDiscovery = true
And restart the service:
sudo systemctl restart shutters.conf`
Home Assistant entities and Google Home
At this point the tab with the subscriptions should be full of messages. These are auto-discovery messages over MQTT for each of the programmed covers. This will cause Home Assistant to automatically add the entities.
They should show up with the same names as in PiSomfy.
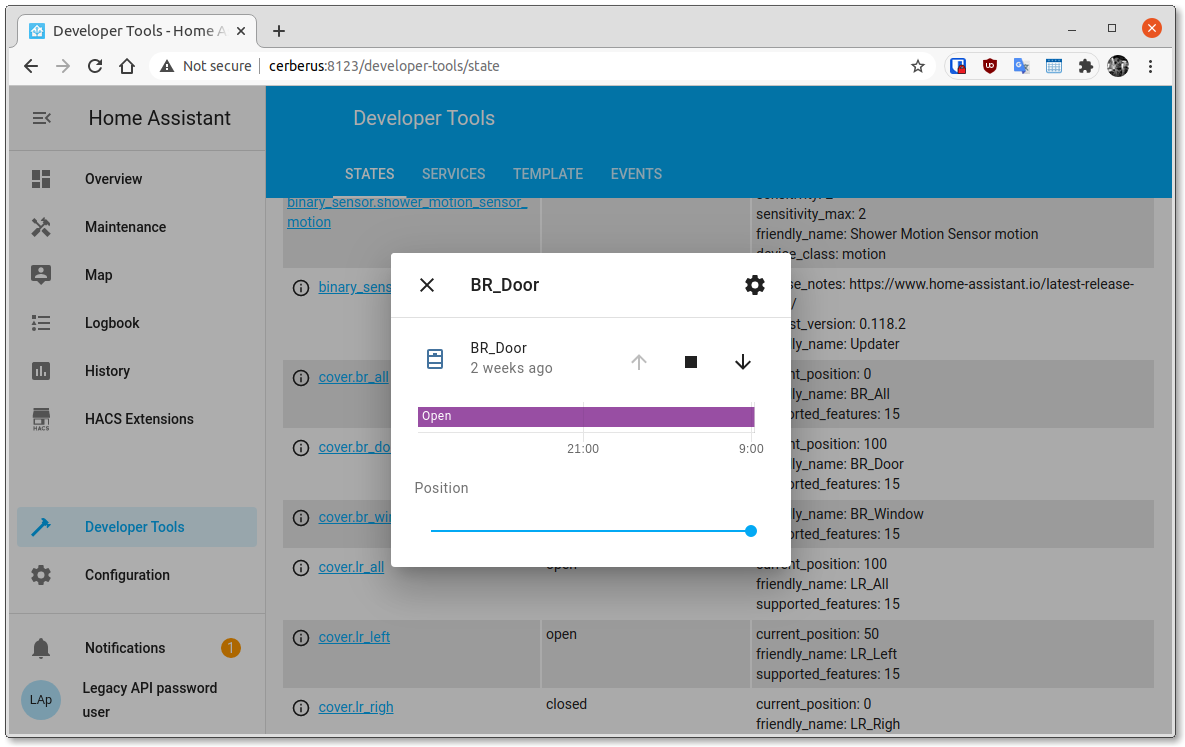
Home Assistant Entities auto discovered via MQTT.
Adding them to a dashboard is relatively trivial, for example:
type: entities
entities:
  - entity: cover.lr_all
    name: Living Room Covers
In order to simplify things, I wanted to only expose the _all blinds (a.k.a. covers) to Google Home/Assistant. For that I added an explicit section in the /etc/homeassistant/configuration.yaml section of google_assistant:
google_assistant:
  # ...
  exposed_domains:
    - fan
  entity_config:
    cover.br_all:
      expose: true
      aliases:
        - "Bedroom Covers"
    cover.lr_all:
      expose: true
      aliases:
        - "Living Room Covers"
After restarting Home Assistant, and uttering the magical Ok Google, Sync All Devices, the covers will show up in your Home App:
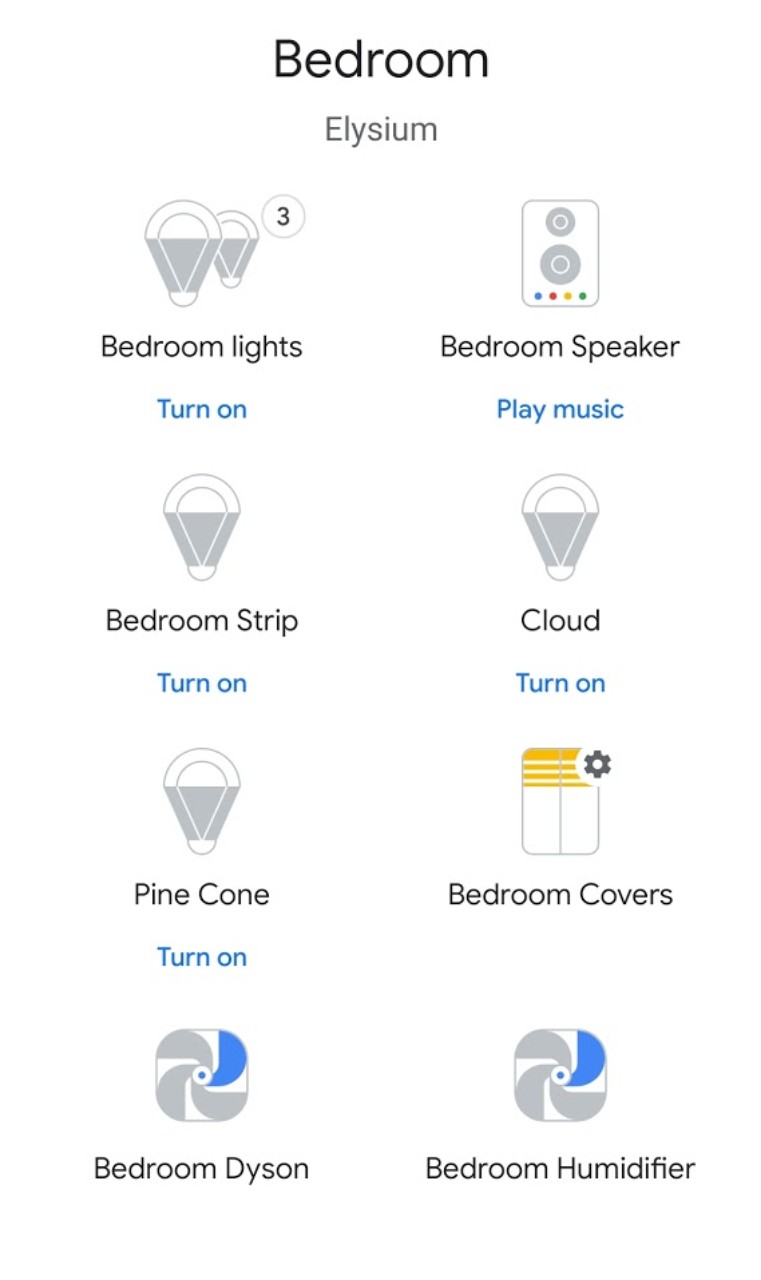
Looks like a blind, acts as a blind.
This means you can controll it using keywords:
- Ok Google, close Bedroom covers
- Ok Google, open Bedroom covers
- Ok Google, set Bedroom covers to 50%
The killer feature is setting this up as a routine to open/close the blind as you wake up, go to sleep.
Happy hacking :)